DOLLY OPERATIONS
(Continued)
Attaching Platforms
Platforms can be placed in four different positions on the dolly, the upper and lower sides. One can also be placed on the Front Drop Bracket. They come in two different sizes, 6" x 24" and 10" x 20"..
NOTE: The 6 x 24 platform should not be placed in a lower side position because it is not wide enough by itself to stand on comfortably, and it may interfere with wheel turning, unless the dolly is running on track.
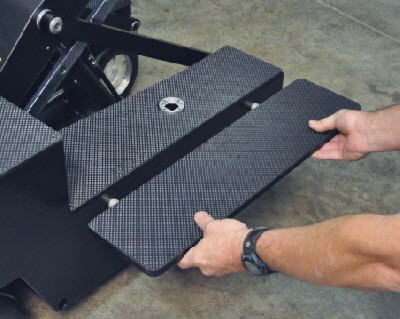
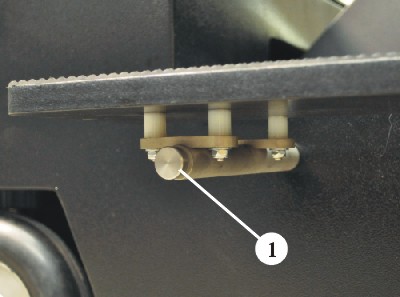
To attach a platform, align with the 2 sockets on the dolly frame, as shown in Figure DO12, press in the release buttons on the end of the Support Rods(1) and push straight in until they 'click'. Check that the rods are engaged properly by trying to pull the platform out.
To remove the platform, press the release buttons in while pulling the platform out.

Figure DO12

Figure DO13
Using Camera Risers
Camera risers come in varying sizes and are used to get the camera higher.
NOTE: To avoid unsteady camera movement, do not use a riser taller than needed. The further away the camera is from the leveling head, the 'shakier' the camera will become.
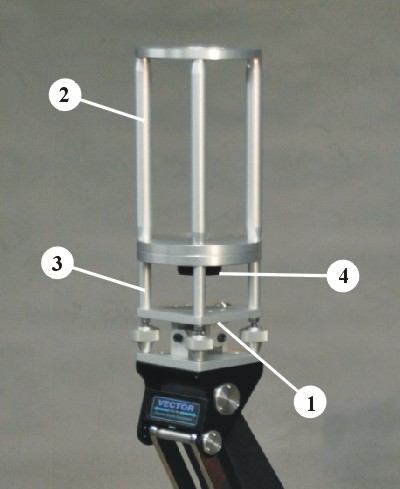
Attach a Camera Riser(2) directly to the Leveling Head(3) and secure with the Locking Nut(4) as shown in Figure DO14.

Figure DO14
< Previous Page --- Next Page >
Copyright © 2019 Premier Studio Equipment, Inc.